| Watch Assured Automation’s V4 Series Electric Actuator Product Demonstration. This video shows how to wire an Assured Automation V4 Series Electric Actuator for 115 Volt AC Wiring. The V4 Series is equipped with a reversible motor and end of travel limit switches.Hello and Welcome to Tech Talk
My name is Brian and in this video we will be showing you how to wire an Assured Automation V4 Series electric actuator. This will be for 115 Volt AC wiring only. The V4 actuator is equipped with a reversible motor and end-of-travel limit switches which stop the motor in each direction. External wire leads are provided so you can wire the electric actuator without removing the cover. Before we begin be sure that your 115 Volt AC supply power is disconnected to avoid shock. To drive the unit to the open position or the counter clockwise direction, locate the white wire, number 1, also referred to the common wire. Then locate the red wire, number 5, also referred to as the counter clockwise travel wire. When AC power is applied to these wires, white and red, the actuator will run in a counterclockwise direction until it reaches the end of travel, or approximately 90 degrees. To drive the unit to the closed position or clockwise direction, locate again the white wire, number 1, also referred to as the common wire, then locate the black wire, number 3, also referred to as the clockwise travel wire. When AC power is applied to these wires, white and black, the actuator will run in a clockwise direction until it reaches the end of travel or approximately 90 degrees. Please note at the end of each travel position there are internal limit switches which open the circuit and stop the motor. These switches also send supply voltage back out for those who wish to confirm the travel position – open, closed or both. The blue wire, number 2, will be used to indicate the closed position and the yellow wire, number 4, will be used to indicate the open position. These wires will have power on them at the end of each travel position, so if you are not using these wires for travel indication please be sure the ends of these wires are properly taped off and separate from one another to prevent a short or shock. One final feature is the manual override. This allows the user when power is not present to mechanically move the actuator shaft in a counter clockwise or clockwise direction. Again power should be disconnected when manually overriding the actuator. For manual override operation, first remove the black cap as shown here. And turn the actuator shaft by applying an adjustable wrench to the flats of shaft. You can turn this in a counter clockwise or clockwise direction for your desired rotation. The wiring we just discussed can be found on the inside cover of the actuator, or you can access the drawing online from our website at AssuredAutomation.com. Thank you for viewing Tech Talk, and see you next time. |
| Order Online or Call Toll-Free 1-800-899-0553 | Log-in/Create Account |
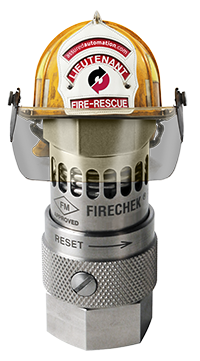
Adds Thermal Shutdown to ANY spring
return pneumatic actuator!
 an Assured Automation
Exclusive!
• Vents actuator to failsafe
• Closes air supply line
• Easy to test and reset
• No contact with process media
Pneumatic Actuators
Pneumatic Actuators
Ball & Butterfly Shut-Off Valves
Automated valve assemblies with
Emergency Shutdown Function included
with Fusible Links
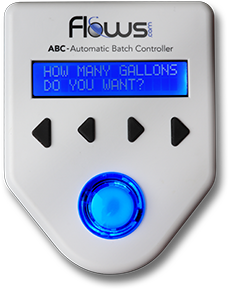
Automatic Batch Controller
– How Many Gallons Do You Want?

• Low-Cost
• Easy to Use
• Selection of Meters
• Selection of Valves

Seals: Viton, EPDM, or Buna
Seals: Viton, EPDM, or Buna
End Conn: Ni plated Brass (wetted)
Piston: Chem. Ni plated Brass (wetted)
Seat: PTFE 15% Glass Fiber Seals: Viton, EPDM, or Buna
G (BSPP): 3/8″ to 2″
Seals: PTFE
Tri-Clamp: 1/2″ to 2″
Seals: FKM
Seats: PTFE
Seals: PTFE
Seats: PTFE
Seals: EPDM or Viton
Seats: PTFE
Glue Socket: 1/2″ to 4″
Seals: PTFE
Seats: PTFE
Seals: PTFE & Viton
Seats: RPTFE
Seals: PTFE
Seats: RPTFE
Socket Weld: 1/4″ to 3″
Tri-clamp: 1/2″ to 4″ Ext. Tube Butt Weld: 1/2″ to 4″
Seals: PTFE
Seats: RPTFE
Socket Weld: 1/4″ to 3″
Tri-clamp: 1/2″ to 4″
Seals: TFM or Graphite
Seats: TFM or 50/50
300#: 1/2″ to 8″
Seals: TFM or Graphite
Seats: TFM or 50/50
300#: 1/2″ to 8″
Seals: TFM or Graphite
Seats: TFM or 50/50
Socket Weld: 1/2″ to 4″
Seals: TFM or Graphite
Seats: TFM or 50/50
Socket Weld: 1/2″ to 4″
Seals: TFM or Graphite
Seats: TFM or 50/50
Socket Weld: 1/2″ to 4″
Trim: API Trim 8 (others available)
300#, 600#, 900#, 1500#: Call
Seals: PTFE
Seats: PTFE
Seats: PTFE, TFM, or 50/50
Seats: PTFE, TFM, or 50/50
150#/300#: 1/2″ to 8″
Tri-Clamp: 1/2″ to 4″
Seals: PTFE
Seats: PTFE
Seats: PTFE
Seals: PTFE
Seats: PTFE
Seals: PTFE/Viton or RPTFE
Seats: RPTFE
Seals: RPTFE/Viton
Seats: TFM
Seals: TFM
300#: 1 1/2″ to 6″
Seats: PTFE
Seats: EPDM or Viton
Glue Socket: 1/2″ to 2″
Seats: EPDM, SIlicon, or Viton
Butt Weld: 1/2″ to 6″
Seats: Polypropylene
Lugged: 2 1/2″ to 12″
Seats: RPTFE
Lugged: 2″ to 12″
Seats: Graphite
Lugged: 3″ to 48″
ANSI class 150, 300, 600
Seats: Graphite
Lugged: 3″ to 48″
ANSI class 150, 300, 600
Seats: BUNA or EPDM
Lugged: 2″ to 24″
Seats: Viton
Lugged: 2″ to 24″
Plug: PFA Lined Ductile Iron
Seals: PTFE, RPTFE, PFA, or Special
300#: 1/2″ to 12″
Trim: SS, TFE, or PEEK
300#: 1/2″ to 4″
NPT: 1/2″ to 2″
SW: 1/2″ to 2″
Trim: Bronze, SS, or PEEK
Butt Weld: 1/2″ to 2″
Trim: Bronze or SS
300# Flange: 2 1/2″ to 8″
Trim: API Trim 8 (others available)
300#, 600#, 900#, 1500#: Call
Trim: API Trim 8 (others available)
300#, 600#, 900#, 1500#: Call
Seats: PTFE
Seals: PTFE
Seats: PTFE
Seals: PTFE
NPT (male x female): 1/4″ to 1″
Solder: 1/2″ to 4″
Seats: PTFE
Seals: PTFE
Socket Weld: 1/4″ to 3″
Tri-Clamp: 1/2″ to 3″
Seats: PTFE
Seals: PTFE
Seats: PTFE
Seals: PTFE
NPT (male c female): 1/4″ to 1″
Solder: 1/2″ to 4″
Seats: PTFE
Seals: PTFE
Socket Weld: 1/4″ to 3″
Tri-Clamp: 1/2″ to 3″
Body: Carbon or Stainless Steel
Seals: Delrin®
SW: 1/4″
150#: 1/4″
300#: 1/4″
Lugged: 1/4″
Wafer: 1/4″
Seals: Delrin®
ISO: 1/4″
Seals: Graphoil
Seats: Xtreme RPTFE
150#/300#: 1/2" to 4"
Lug/Wafer: 3" & 4"
Seals: TFM or Graphite
Seats: TFM or 50/50
300#: 1/2″ to 8″
NPT: 1/2″ to 4″
Socket Weld: 1/2″ to 4″
Seat: API Trim 8 or 12
Cover Seal: Graphite
300#: 2″ to 16″
Seals: TFM or Graphite
Seats: TFM or 50/50
300#: 1/2" to 8"
Seals: Graphoil
Seats: Xtreme RPTFE
150#/300#: 1/2" to 4"
Lug/Wafer: 3" & 4"
Seals: TFM or Graphite
Seats: TFM or 50/50
Socket Weld: 1/2″ to 4″
Seals: TFM or Graphite
Seats: TFM or 50/50
Lugged: 2″ to 12″
Seals: TFM or Graphite
Seats: TFM or 50/50
300#: 1/2″ to 8″
NPT: 1/2″ to 4″
Socket Weld: 1/2″ to 4″
End Caps: Powder coated die-cast aluminum
Double Acting: up to 59,000 in/lbs.
Double Acting: up to 21,430 in/lbs.
Double Acting: up to 25,600 in/lbs.
Double Acting: up to 25,600 in/lbs.
Water: 100% removal
Water: 100% removal
BSPP: 1/4″ to 2″
T-clamp: 1/2″ to 2″
T-clamp: 3/4″ to 2 1/2″
Flange: 1″ to 2″
Glue Socket (female): 1″ to 4″
Flange: 3″ to 4″
Insertion: 1 1/2″ to 8″
Insertion: 1 1/2″ to 8″
Flange: 1 1/2″ to 2″
Straight forward and easy to understand training materials covering the most important concepts in valve automation.
Read posts about valve applications, case studies, problem/solutions, industry news, and more. Customer reviews of products and testimonials are also included.
View our entire library of videos. Product Overviews, How-to Videos, Wiring Instructions, and more. Subscribe to our YouTube channel to me notified of new additions.
See Assured Automation in the leading industry publications. Whenever we make news, we put a link to it here.W

